
Rooting your device is basically like gaining administrative rights on a PC. You're able to install custom firmware, remove unwanted bloatware applications and generally get a little more hands on with the core functionality of the phone. For seasoned Android veterans, rooting is practically the first thing they do when they take a new phone out of its packaging, but if you're a novice, then you might want to exercise a little caution.
As with any process which involves tampering with your phone's firmware, rooting your device can have negative as well as positive consequences. Although it's unlikely, you could end up with a bricked and unresponsive handset -- so consider yourself warned. You'll also void your warranty.
Another thing to note is that this guide relates to the GT-i9505 with the Snapdragon 600 chipset, and not the octo-core variant. This process will also not work with S4 handsets which have the a software baseband ending in MDM. You can find out your baseband reference by going to Settings > More > About Phone.
And finally, this guide assumes you're using Windows 7 on your PC.
With that out of the way, let's get on with the rooting, shall we?
1. Back up your phone
Although this process won't wipe any data from your phone, it's always prudent to make sure you've backed up any precious data before proceeding. CNET UK cannot be held responsible for any damage or data loss you may suffer as a result of following this guide, mmmkay?2. Download Motochopper
This is the application which performs the rooting process. Although it's been developed for Motorola devices -- hence the title -- it works on certain Qualcomm-based phones, too. You can download it from here. Once you've done that, extract the files.
3: Switch on USB debugging
To perform this step, you'll need to activate your S4's developer menu if you haven't done so already. Navigate to Settings > More > About Phone. Scroll down to Build Number and tap it seven times. This will enable the Developer Options menu, which you can find in the More area of the Setting menu. Navigate there and then tick the USB Debugging box. Next, plug your phone into your PC using your standard micro-USB cable. You'll have to wait for Windows to install the necessary drivers.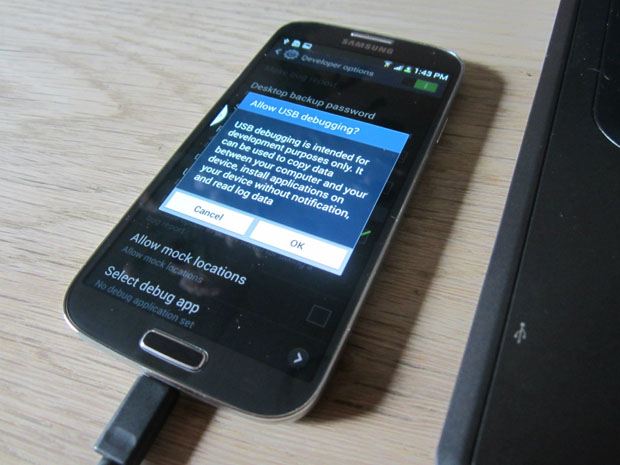
4: Fire up Motochopper
Locate the Motochopper files you extracted earlier and double click the 'Run' executable. You'll see a screen like the one below:
5: Follow the on-screen prompts
Press enter to root your device. Your Galaxy S4 should pop a notification message up -- simply tap 'OK' to proceed with the rooting process. If you don't see a message, just double check that you've got the latest Samsung drivers and that USB debugging is definitely switched on.
Once the process is complete, you'll see a screen like the one below. Press enter, and your freshly-rooted Galaxy S4 will reboot. Open up your app drawer and you'll notice that the all-important Superuser application has been installed. Welcome to the world of rooted Android!

Thanks for sharing this great article! That is very interesting I love reading and I am always searching for informative information like this.
ReplyDeleteNo link to Motochopper download here !
ReplyDeleteThank you for the remark. The link is now working.
DeleteMany thanks for you :D
ReplyDelete